
实拍+AI的终极玩法,召唤异兽,路径轨迹+动作捕捉,自己导演Ai电影【ComfyUI高级第二期·下】
这里是黑石宇的频道,第二期高级教程下半集!
学习颠覆性的免费 AI 视觉特效工作流。
仅使用一张参考图像与 ComfyUI 中的 Wan 2.1. VACE,即可更换任何背景。
视频教程链接
B站链接:https://space.bilibili.com/676258353
油管链接:https://www.youtube.com/@%E9%BB%91%E7%9F%B3%E5%AE%87/videos
感谢在B站,和我的博客,为我充电的同学!感谢你们支持我的创作!
联系我不要发私信,请发邮件并详细说明事由,谢谢!blackstonexinyu@gmail.com
以下是这一期工作流效果展示
high quality video of a small cute dragon running on a stone bench. The dragon has a shiny, textured scales, a yellow underbelly, and a pair of small horns. It joyfully runs toward the camera from a distance, carefully avoiding stones. When it reaches my palm, I gently stroke it with my fingers.

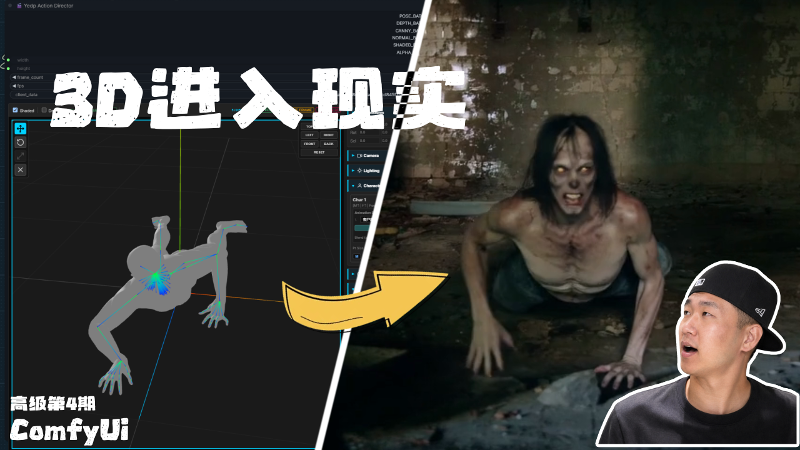
A high-definition video featuring a terrifying humanoid creature running on the ground. It has sharply defined muscles, powerful limbs, and sharp claws on its hands and feet. Its head is conical in shape, without a visible mouth or other facial features; instead, a massive single eye dominates the center of its chest and abdomen, with a deep black pupil reflecting light, giving an eerie yet intelligent impression. It runs joyfully from the left side of the frame toward the right, occasionally glancing at the camera!
通过路径轨迹,转换为内补图像序列,配合提示词就可以实现释放武魂的效果


Photorealistic, cinematic visual effects. Above the real-life man’s open palm, a very small orange hammer spirit weapon hovers in mid-air. The hammer’s overall size is strictly limited to a miniature scale, significantly smaller than a typical one-handed weapon, approximately half the length of an adult male’s palm or even smaller.
The hammer features a compact head and shortened handle. The proportions are restrained and controlled. Large or heroic-scale hammers are not allowed. The hammer must not fill the gray masked area and must remain clearly small with visible empty space around it.
The hammer’s main glow is intentionally reduced to a medium-low intensity orange light, used only to define edges and structure, without strong bloom or overexposure.
Around the hammer, clearly visible orange electric arcs appear. The electric arcs are thicker and longer than usual, with irregular, broken shapes. The arcs intermittently stretch, jump, and retract over short distances, creating strong visual presence. The arc brightness is higher than the hammer’s core glow and is not overwhelmed by it.
The number of arcs is moderate, but each arc is clearly defined, energetic, and realistic, resembling a tangible energy manifestation rather than visual noise.
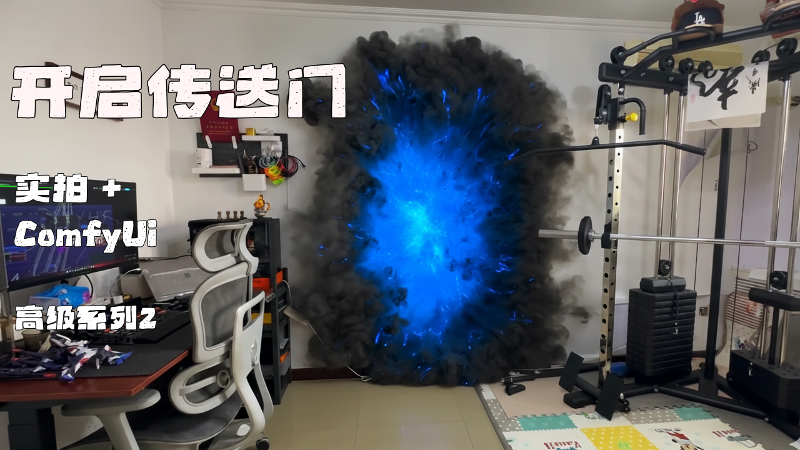
添加任何元素到镜头中,是最核心的功能,也极具真实感,是我们创作的最佳伙伴,
更厉害的是它还可以将你想象的内容通过传送门来到你的面前。


↓↓↓ 工作流和素材文件在文章最下方 ↓↓↓
一、模型下载安装
此工作流程中使用的模型和节点
运行工作流之前,请确保下载所有必需的模型并安装自定义节点。
🟣 下载Diffusion Model
Wan2_1-T2V-14B_fp8_e5m2.safetensors [点击下载]
📁 存储路径: ComfyUI/models/diffusion_models/Wan2_1-T2V-14B_fp8_e5m2.safetensors
Wan2_1-VACE_module_14B_fp8_e4m3fn.safetensors [点击下载]
📁 存储路径: ComfyUI/models/diffusion_models/Wan2_1-VACE_module_14B_fp8_e4m3fn.safetensors
🟣 下载Lora Model
Wan21_CausVid_14B_T2V_lora_rank32_v2.safetensors [点击下载]
#### 优点:模型对参考图真实感的还原度 要远高于lightx。
#### 缺点:如果参考图是场景,非单一元素,在实拍加Ai结合时,我测试中,镜头运动幅度大时,会出现大幅度还原度效果差,不稳定。所以第一期高级教程中,我所使用的是lightx2v。
📁 存储路径: ComfyUI/models/loras/Wan21_CausVid_14B_T2V_lora_rank32_v2.safetensors
🟣 VAE Model
Wan2_1_VAE_bf16.safetensors [点击下载]
📁 存储路径: ComfyUI/models/vae/Wan2_1_VAE_bf16.safetensors
🟣 CLIP Model
umt5-xxl-enc-bf16.safetensors [点击下载]
📁 存储路径: ComfyUI/models/text_encoders/umt5-xxl-enc-bf16.safetensors
## 🧩 核心节点
### - [comfyui_sam3] 图像和视频分割
### - [comfyui-Comfyui_LG_Tools] 使用图像桥接功能
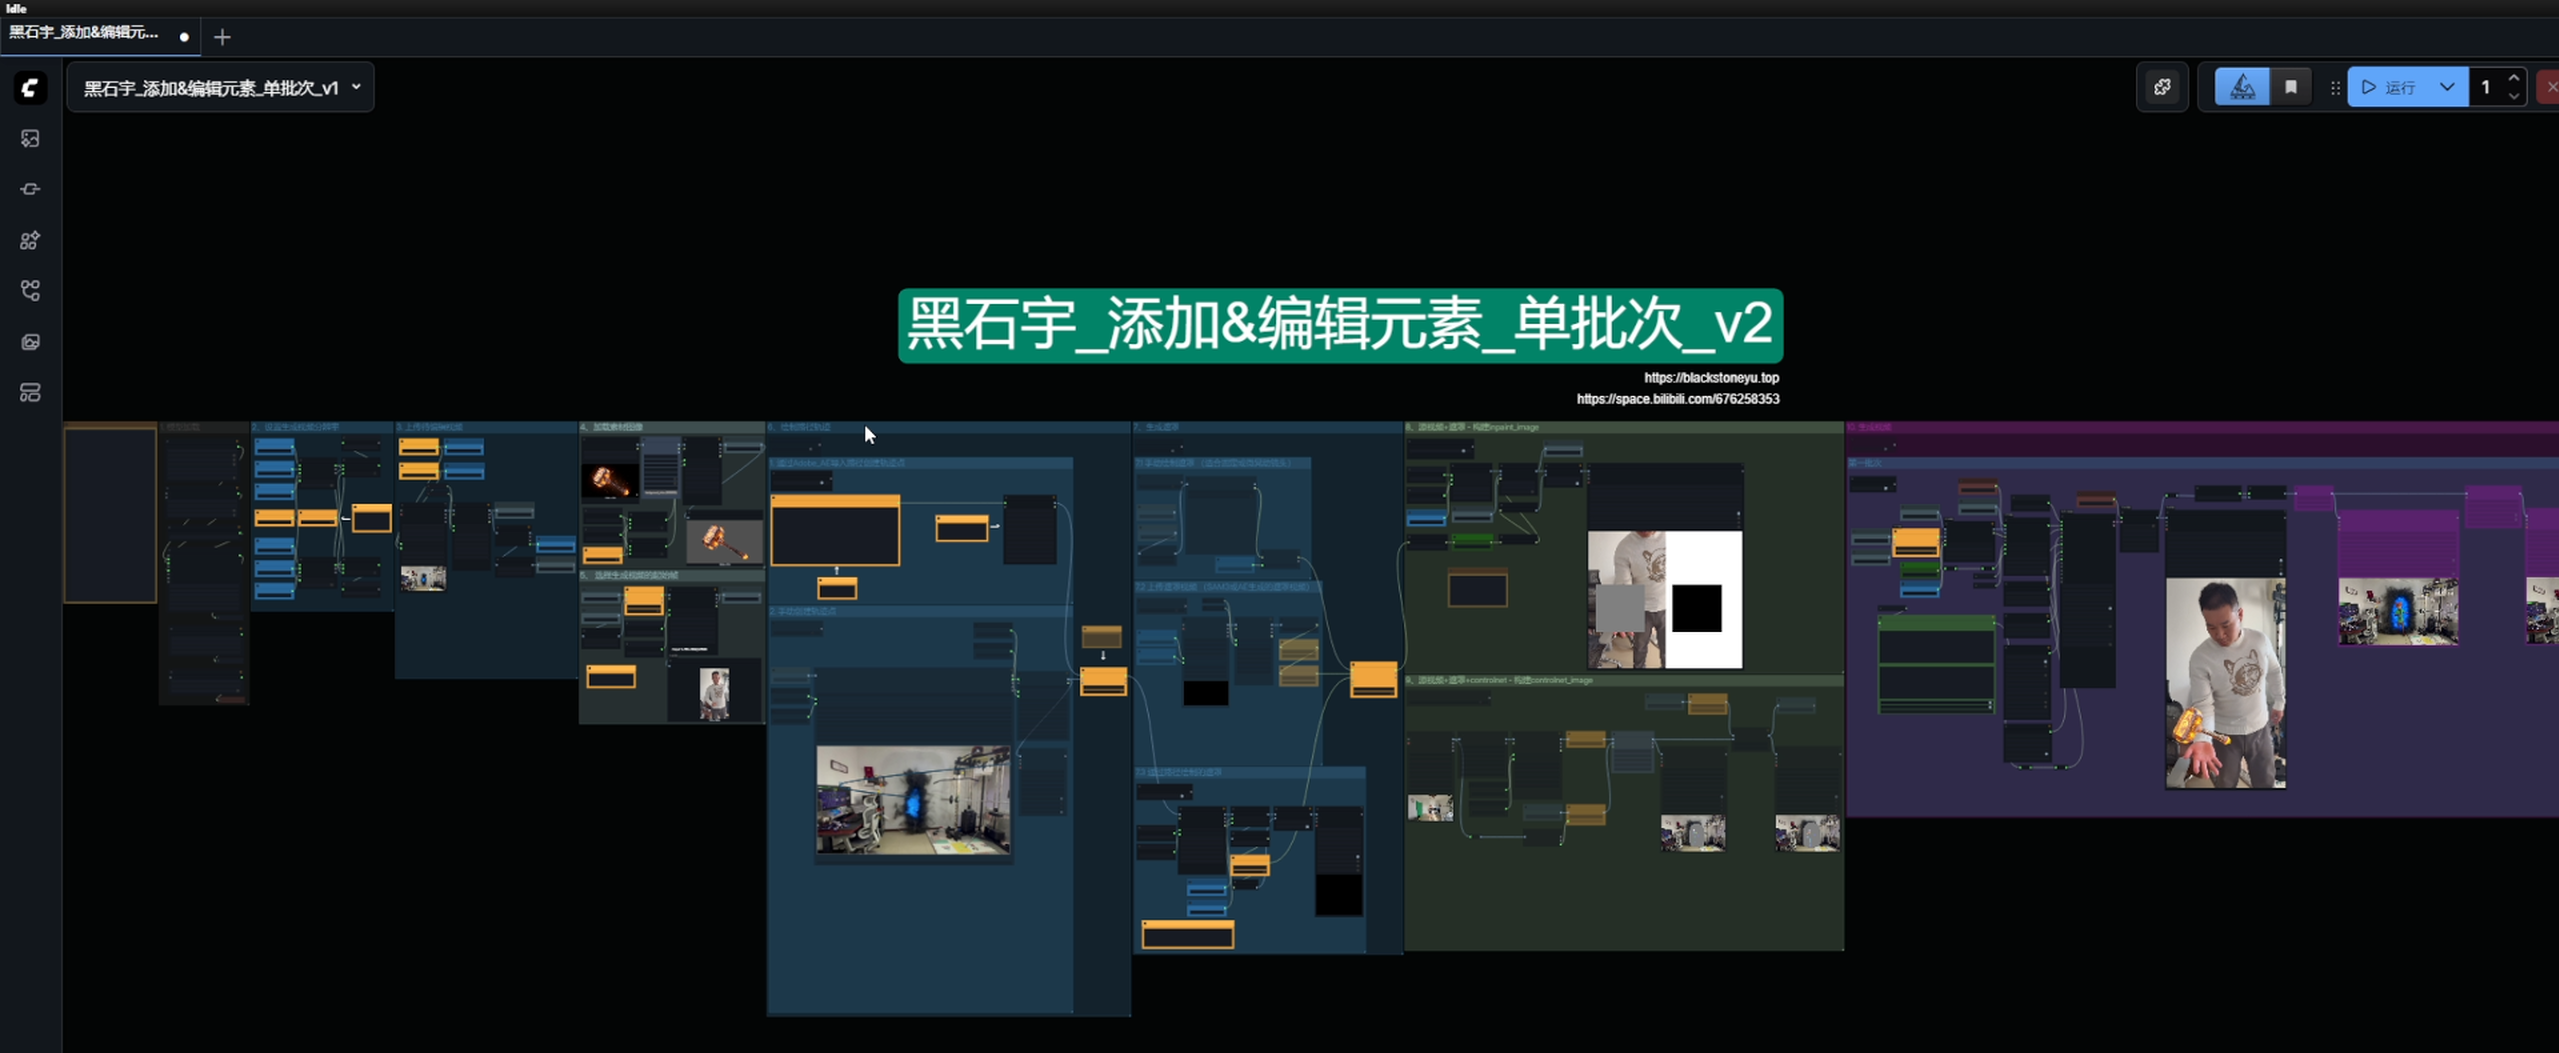
工作流 (照上半期稍有调整,请下载这篇文章的工作流)
顺序依然为从左到右,一共10组内容,所有黄色节点是需要同学们注意设置参数的节点。
工作流有一定难度,需要反复多听多操作,掌握后,不会再有搞不定的工作流!
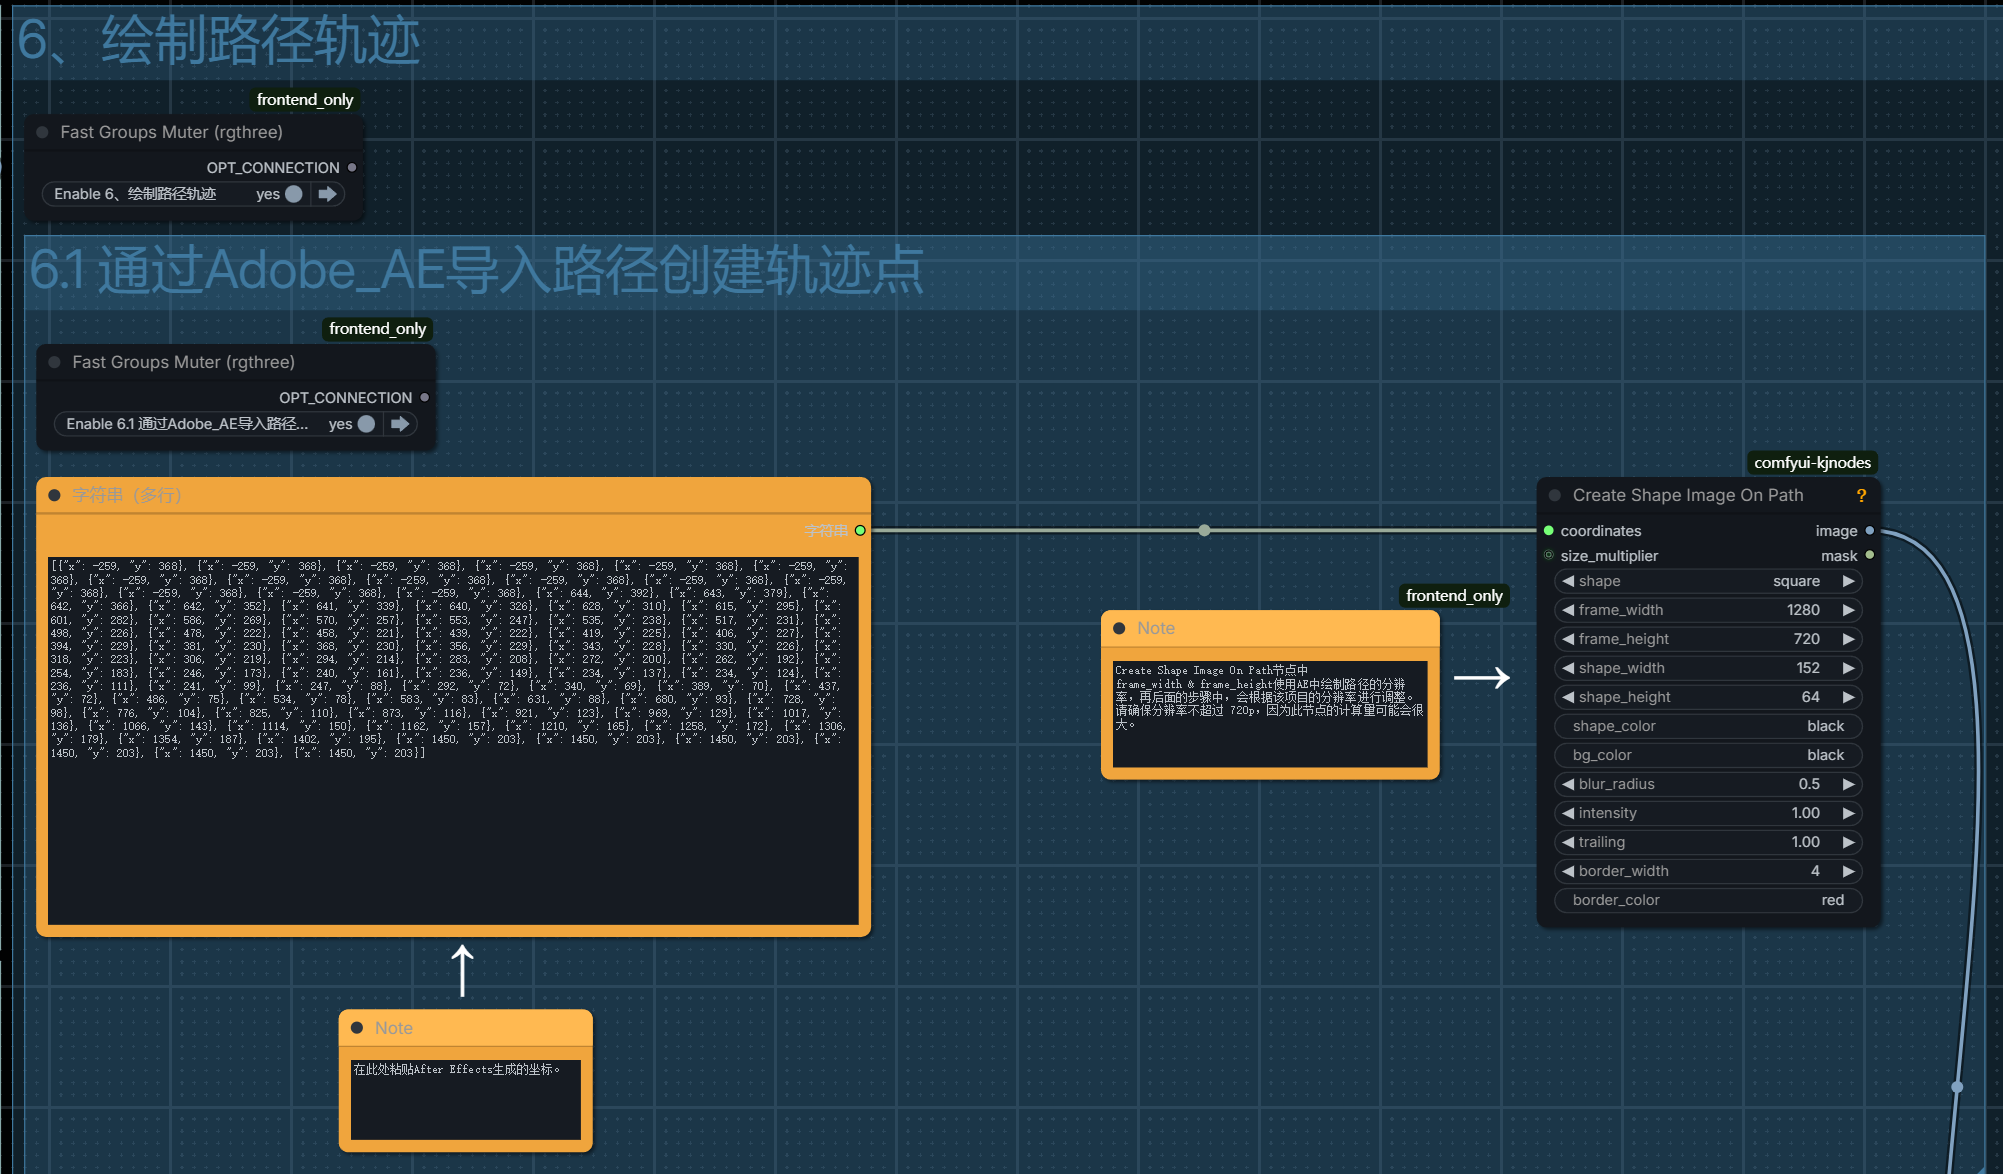
一、绘制路径轨迹
第6.1组需要填写在Adobe AE中绘制的移动轨迹路径。
然后再右侧创建图像节点中,将frame的宽高设置和AE中的保持一致!
方形的宽度和高度比刚刚稍微小一点,152,64,让遮罩为矩形。同学们不要太死板!根据真实需求和生成的效果,反复来调整
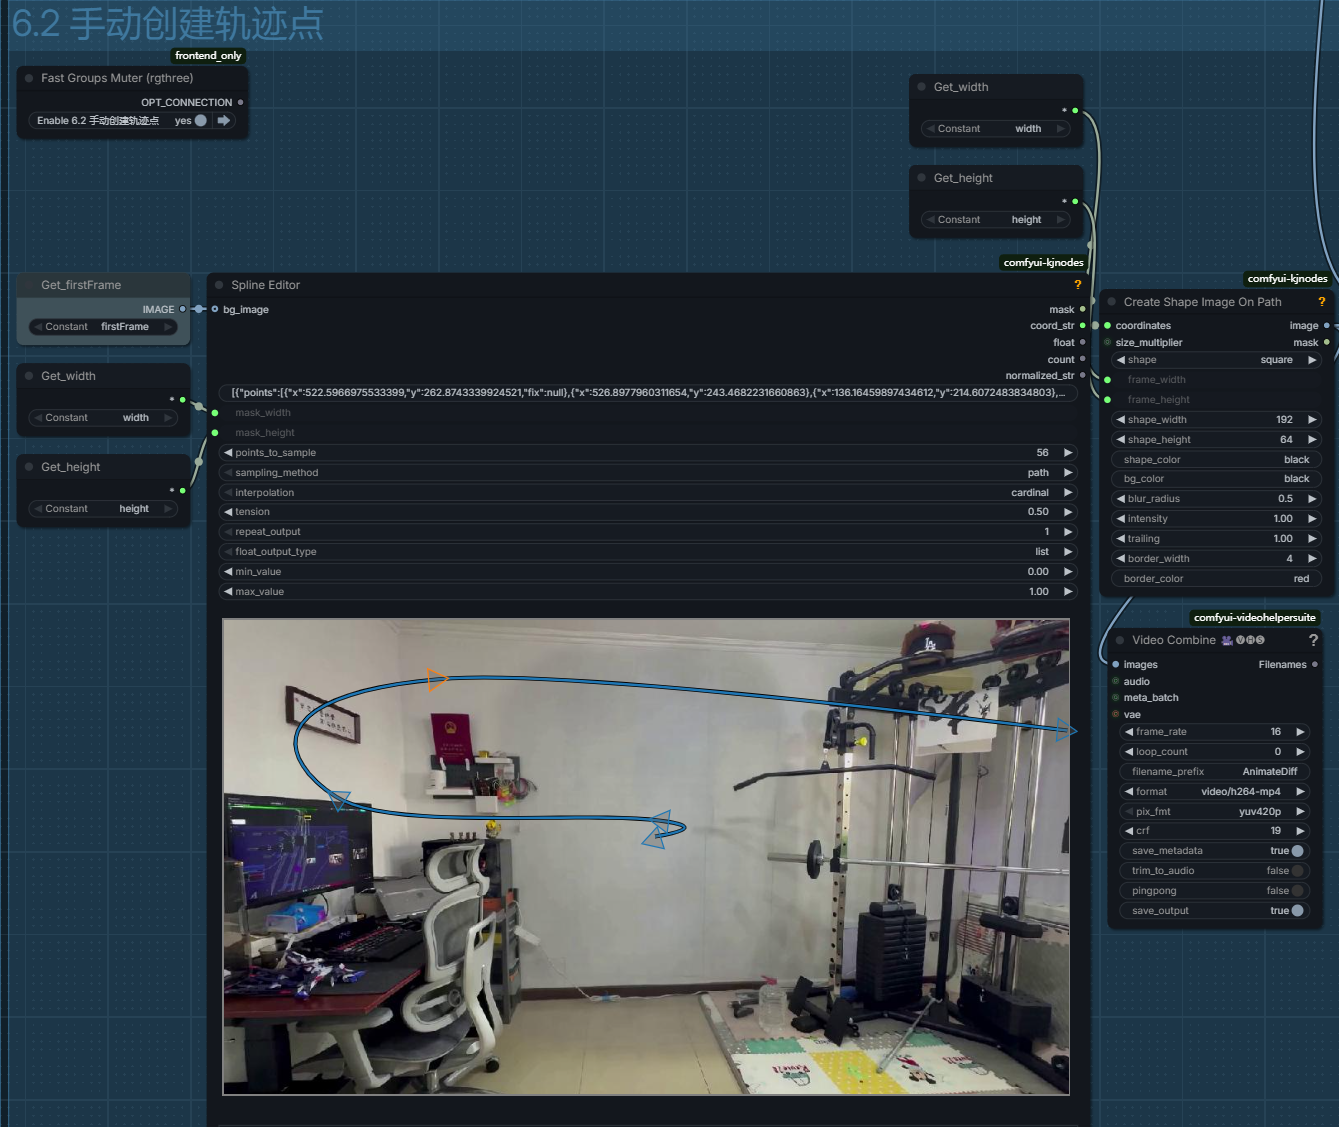
第6.2组内容中,
最核心的节点就是样条线编辑器,首次打开会是空白的,先点击运行,运行后编辑器节点会将传入的BGimage参数做为背景方便我们的绘制!
在画面中点击鼠标右键可以打开菜单栏,可以选择可视化的样式也可以选择add spline和Delete spline来添加和删除新的样条线。
按住键盘shift按键,单击鼠标左键或右键就可以为线段添加新的点,
同样按住shift,右键单击已有的点,就可以删除它!同学们注意,线段的两个顶点是无法删除的!
这种方法绘制起来十分简单,但也有弊端,所有点都不能移动到画面之外,代表无论添加任何元素在一开始就会出现在画面中。
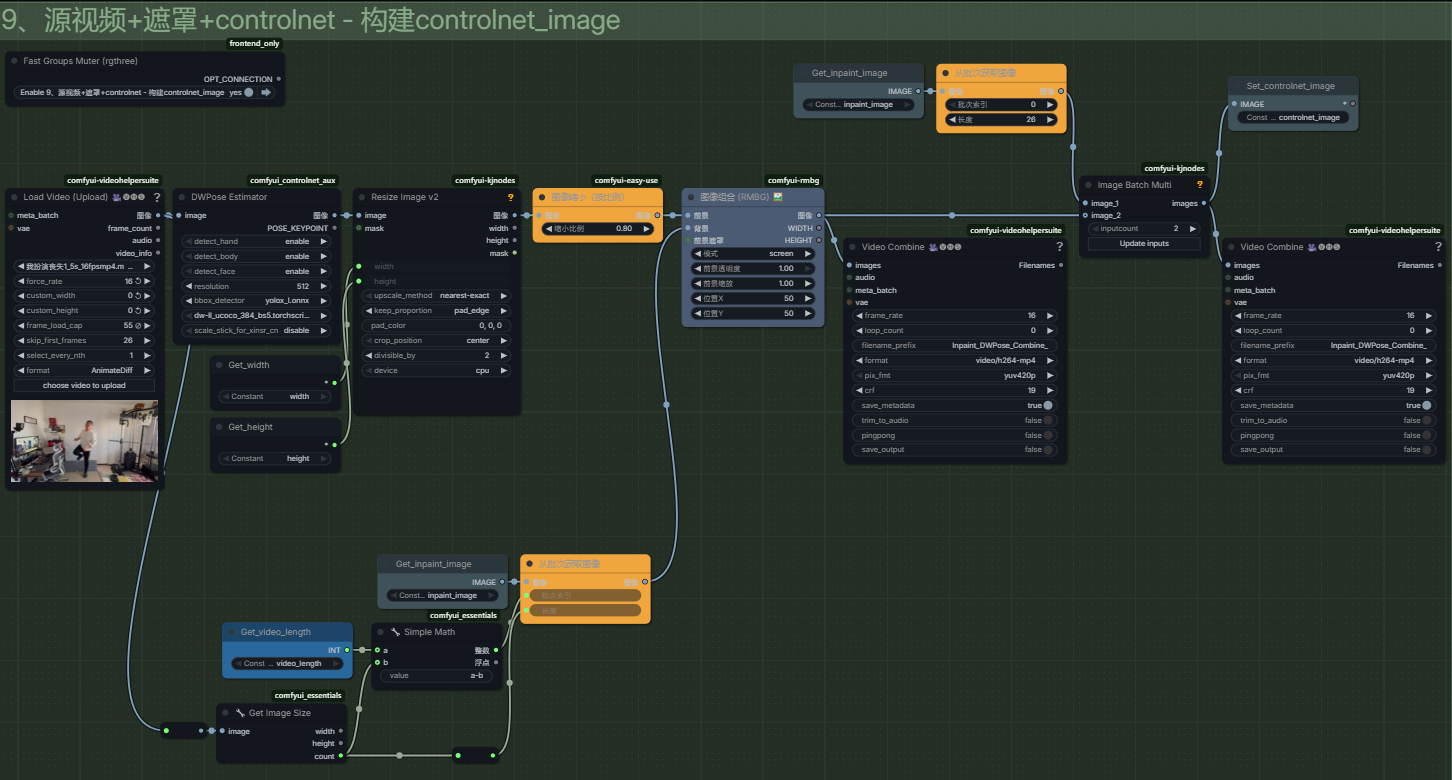
二、Openpose + 内补图像序列
它的中作用是将openpose添加到第八组得到灰色内补区域中!
我们要生成的视频是81帧,我们刚刚绘制的遮罩是在第26帧出现的,
所以openpose只能从第26帧开始添加,一直到第81帧一共为55帧!
所以将frame load cap参数设置为55, 跳过帧数这里跳过与不跳过都可以根据你自己的素材来决定。
其他逻辑节点视频中有详细的讲解。
总结
同义万象vace模型核心功能就是对源视频进行添加元素、编辑元素、以及删除元素!
实拍 + vace的教程暂时到这里就告一段落了!
后续我会把精力用在研究新的开源模型上,
我会尽最大努力创作出真正对影视行业有帮助的内容!
希望大家会继续支持我的创作,我们下一期新的内容,再见!
资源下载
如果你喜欢我的教程,还请在点赞订阅我的B站和油管频道,让我更有动力努力下去,也希望你留下宝贵建议,谢谢!


图片素材:高级2下-图片素材.zip
视频素材:高级2下-视频素材.zip
工作流:黑石宇深度教程_No.2_添加&编辑元素_单批次_v2.json
脚本文件:黑石宇-AE-轨迹导出.js
服务器带宽低,访问人数多的时候吗有点慢,点击后多等待一会儿。